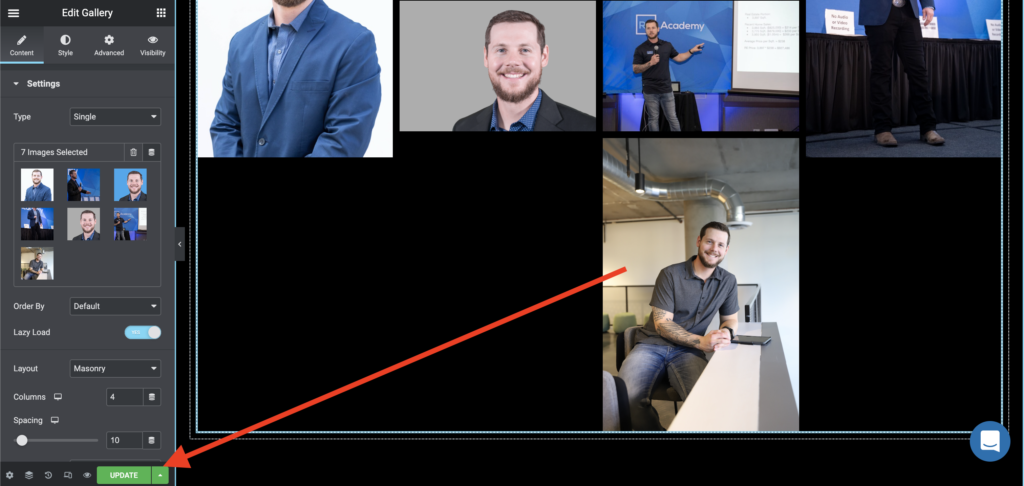
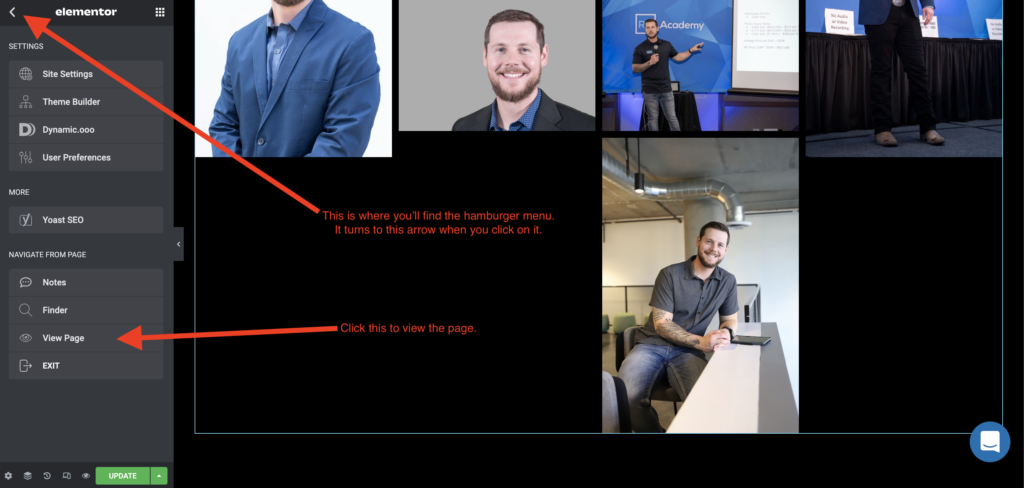
There are several speakers for RALA and each speaker has a photo gallery with images organizations can use in order to promote the speaker. This tutorial shows you how to upload new photos.
This is a very simple task, however, it involves using Amazon S3 storage because the images we upload are such high resolution, the files are too great of size for WordPress.
Step 1: Upload Your Photos to Amazon S3
We upload the full resolution photos to amazon S3 because it is more economical to store them and because often the file sizes are too large for WordPress.
Login to aws.amazon.com and navigate to the S3 service. Once you navigate to S3 you’ll see the buckets (these are like folders). Choose the bucket you want to add to. In this case, ralwebsite.
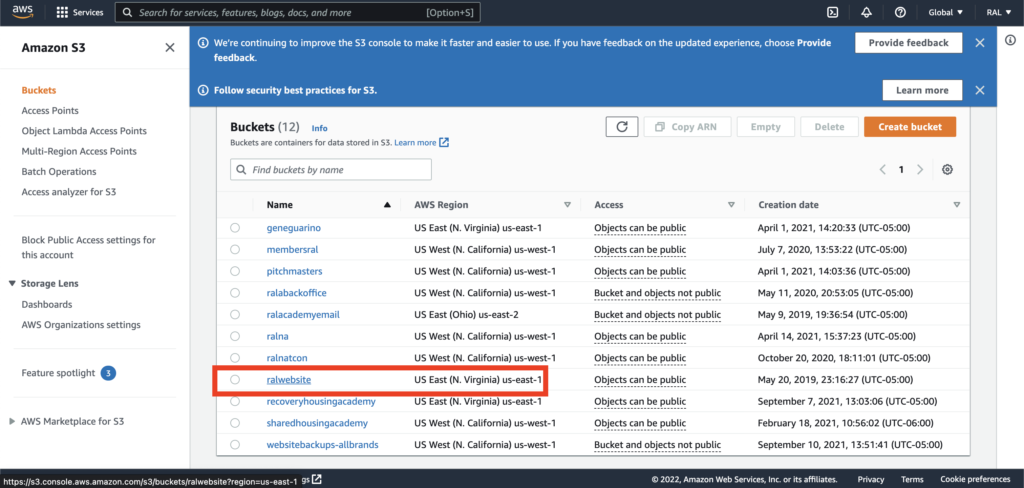
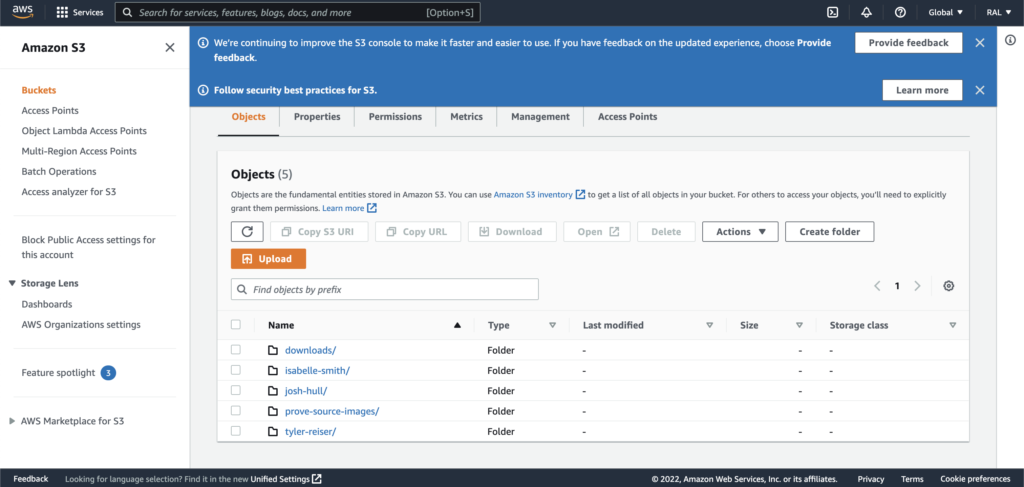
Click the Upload button once you’ve navigated to the speaker/photos folder. Upload the photo, renaming it if necessary so it makes sense and is clear what the image is. I have renamed my photo to josh-hull-10.jpg to keep in the order.
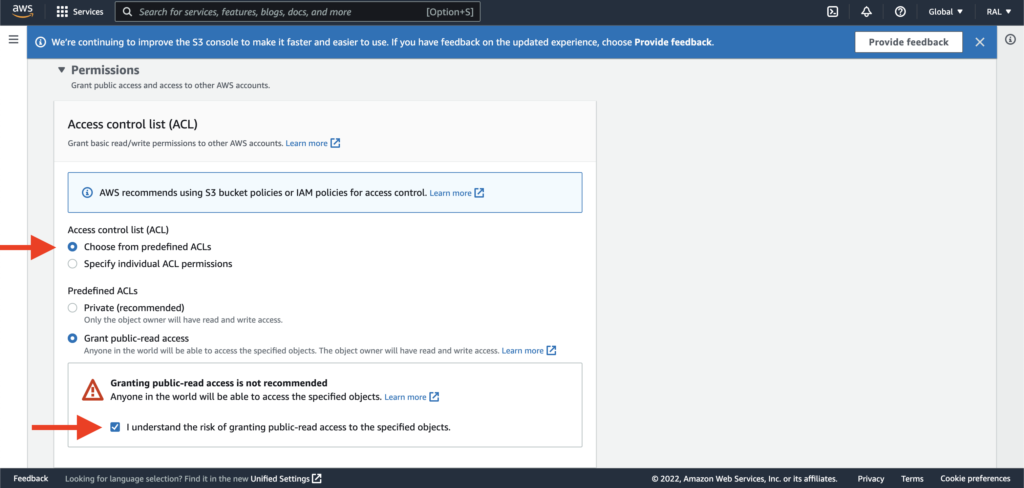
Expand the permissions tab and set permissions to Grant public-read access and then tick the box that you understand.
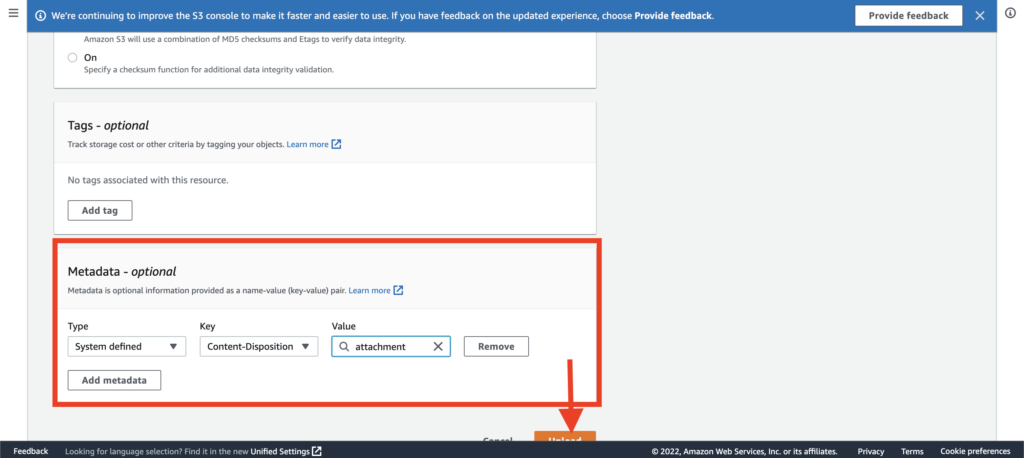
Expand the Properties tab and scroll down to Metadata. Match the meta data settings below. This ensures that when the user goes to download the photo it will force the download. Click upload.
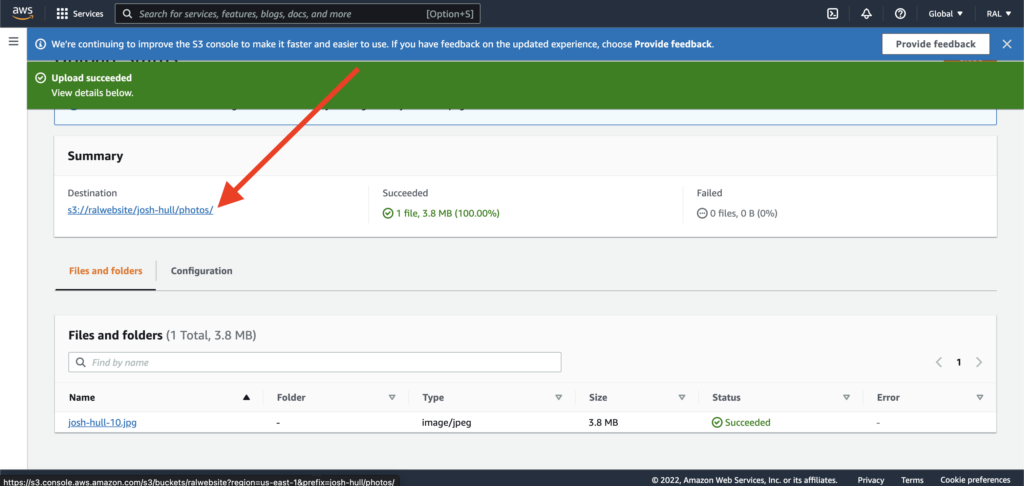
Once uploaded, click the link to the path so you return to the photos folder so you can then copy the URL.
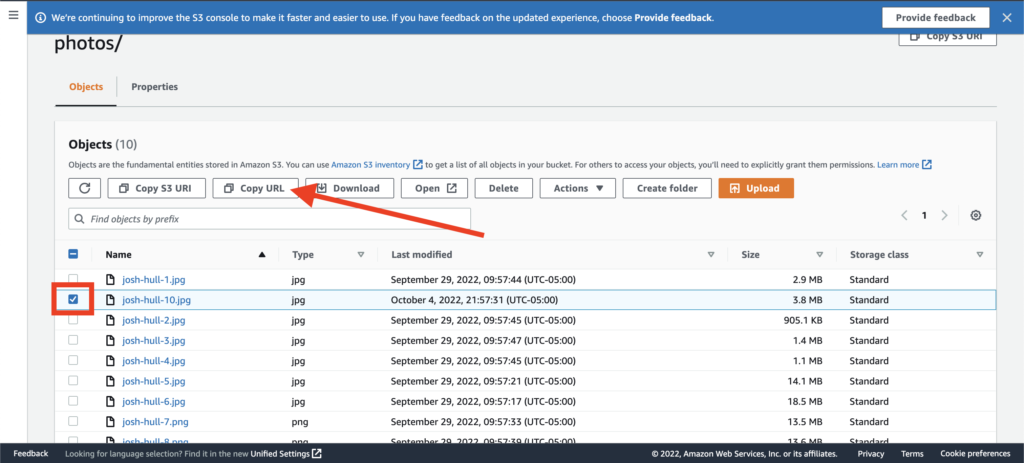
Select the box for the photo and then click the Copy URL button. The URL copied is the one you’ll use on the RALA website.
Step 2: Login and Find Your Media Page
Visit residentialassistedlivingacademy.com/wp-admin and login.
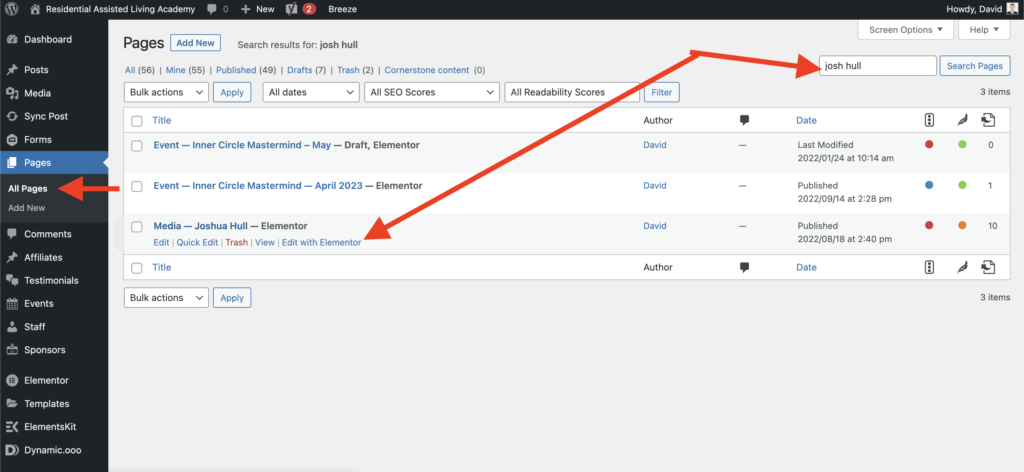
Once you’re logged in, navigate to Pages in the left column and in the upper right hand corner search for the name of the page / speaker you are updating. In this case it is Josh Hull.
When you find it, click the Edit with Elementor option.
Step 3: Add the Photos to the
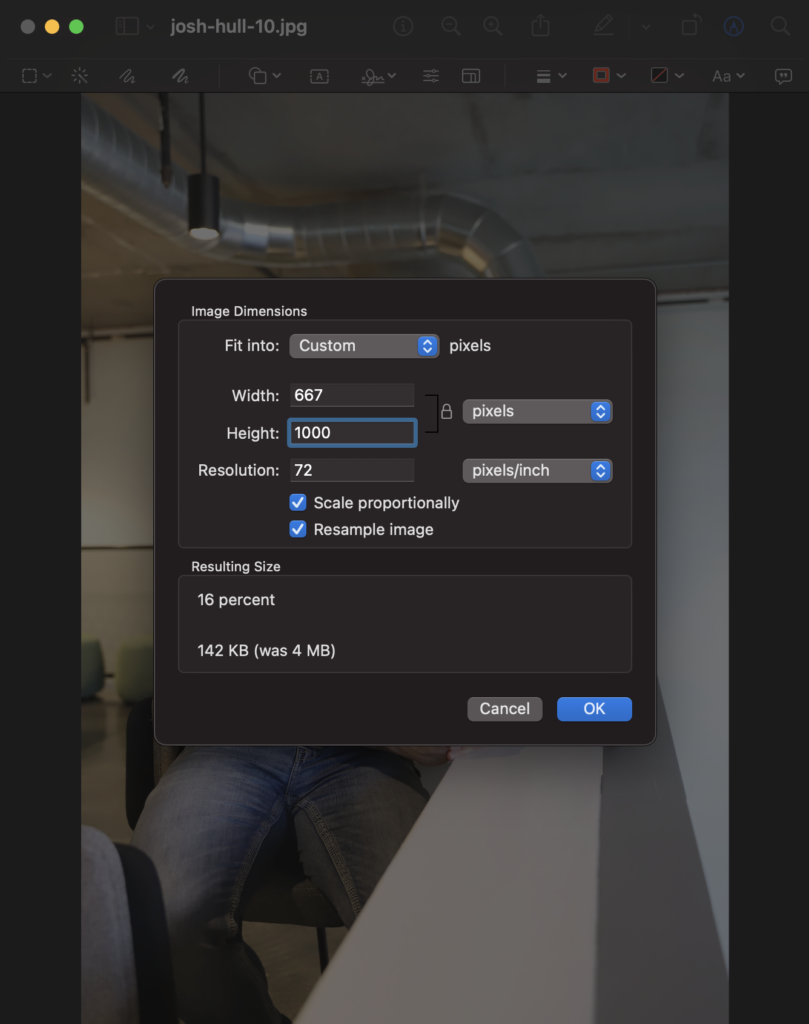
We DO NOT want to upload the full resolution image to the website. You need to resize the image from it’s original size down to 1000 pixels wide for landscape (wide images) or 1000 pixels high for portrait (tall images).
Our example image is a tall image so we set the height to 1000 pixels high.
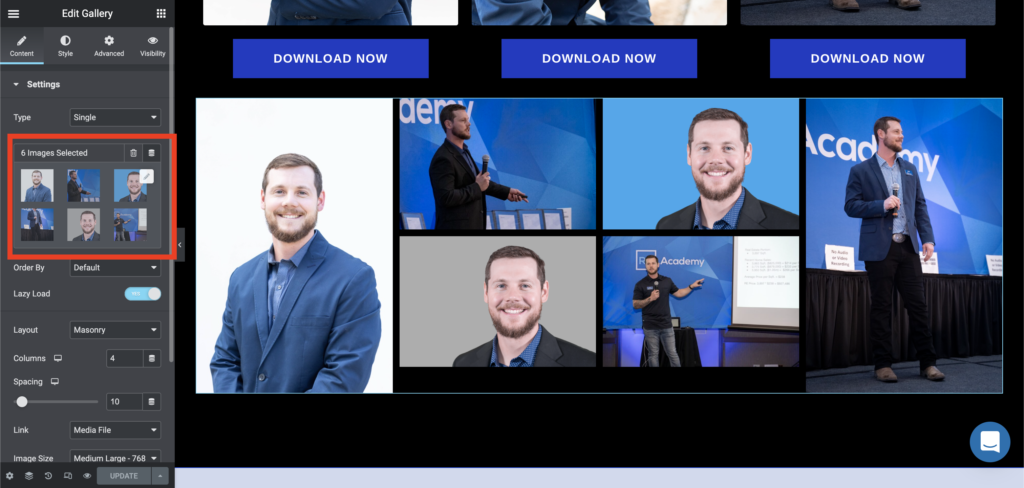
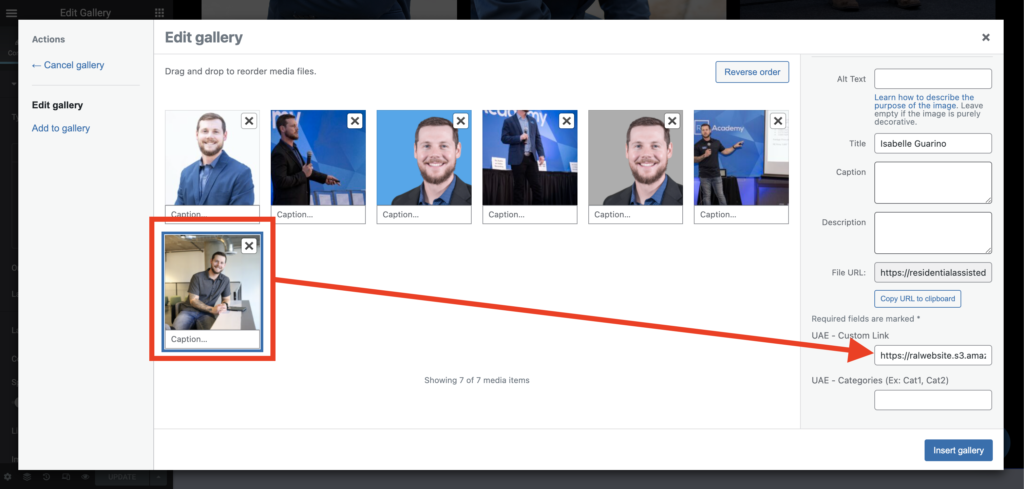
Upload this image to the gallery by clicking the gallery in the left column. When the gallery dialogue appears, upload the new image and then paste the Amazon S3 URL in the UAE Custom Link field. See the screenshot below.
Click Insert Gallery.
Step 4: Update and Review
Once you upload all your images, click “Update” and then view your page. Click the hamburger menu in the upper left hand corder of the Elementor side panel. Then scroll down to look for View Page.
