You will need several items in order to complete this task.
- First name
- Title
- Photo with blue background (#b5d6ef)
- Bio
Step 1: Login to Website
Visit residentialassistedlivingacademy.com/wp-admin and login with your username and password.
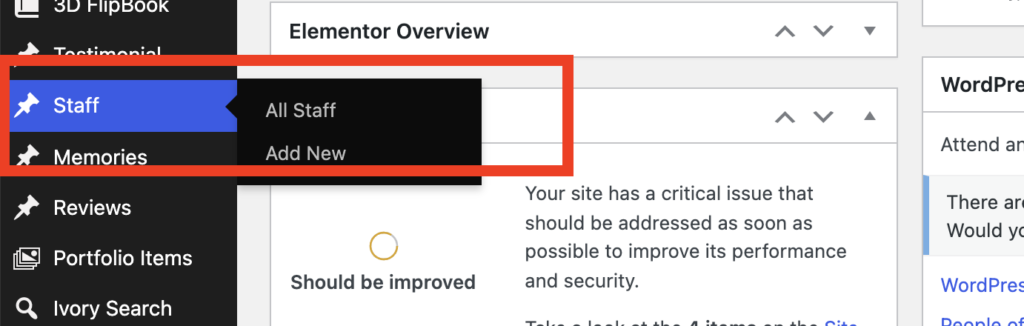
Once you’re logged in, find “Staff” from the left sidebar and click “Add New”.
Step 2: Enter Staff Details
Using the screenshot below as reference, enter in all of the details for the staff member.
Do not use a photo without the blue background. You’ll need to have someone edit out the background contents and add the blue background.
Once you’ve added the First Name, Title, Bio, and uploaded the featured image, click Publish in the upper right hand corner.
Download Photoshop File for Staff Images
You can use the starter file above and easily create the circle image with blue background.
If you’d like to use a different process for updating the background color is #b5d7f0.


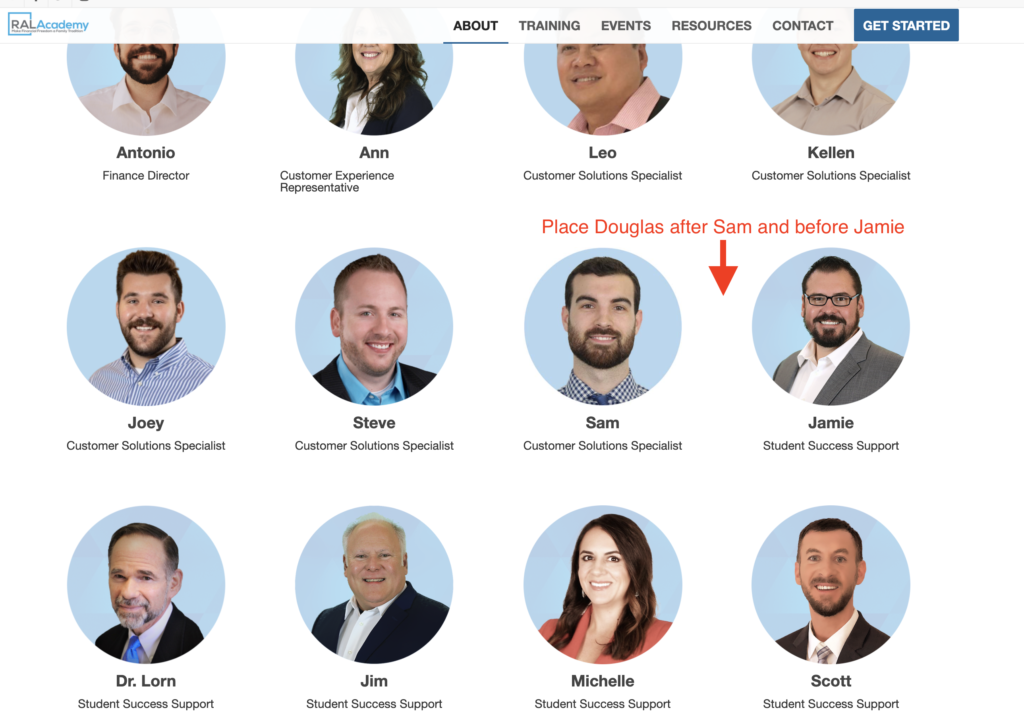
Step 3: Order the New Entry
You will need to place this new entry in the proper order. By default, the entry is added to the top.
Navigate from the sidebar to Staff>All Staff and find your new entry. In this case, Douglas.
Hover over the new entry and you’ll see a tab appear to the left of the entry. Click this tag to drag the entry into the proper order.
Unless otherwise noted, place the entry with other staff of the same title and at the end of the that grouping, newest staff going last.
You can view the about page for reference on where to place staff.
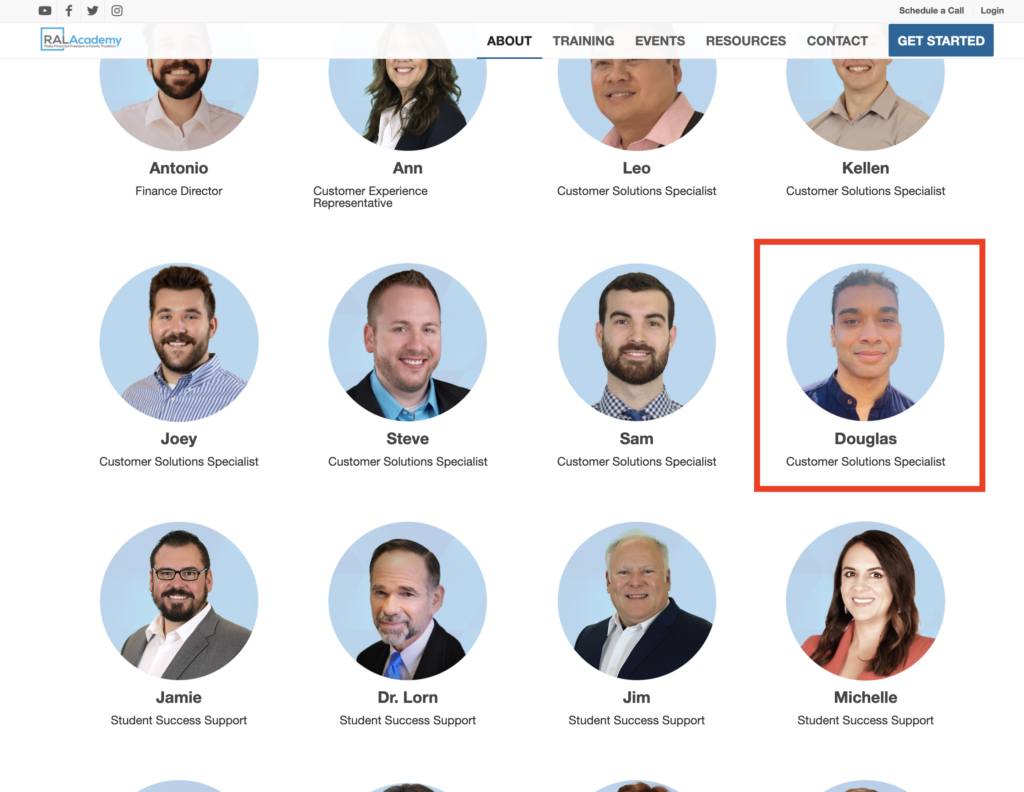
After completing the correct order placement, visit the about page to confirm everything looks correct.
https://residentialassistedlivingacademy.com/about/