SmartMockups Macbook Air Template
Step 1: Create Full Screen Capture of Page
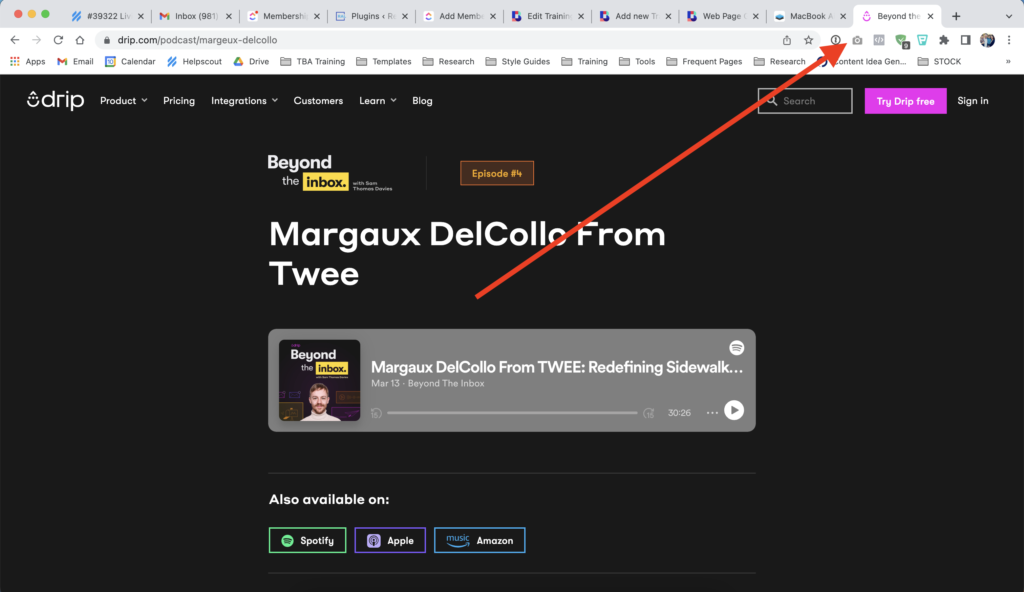
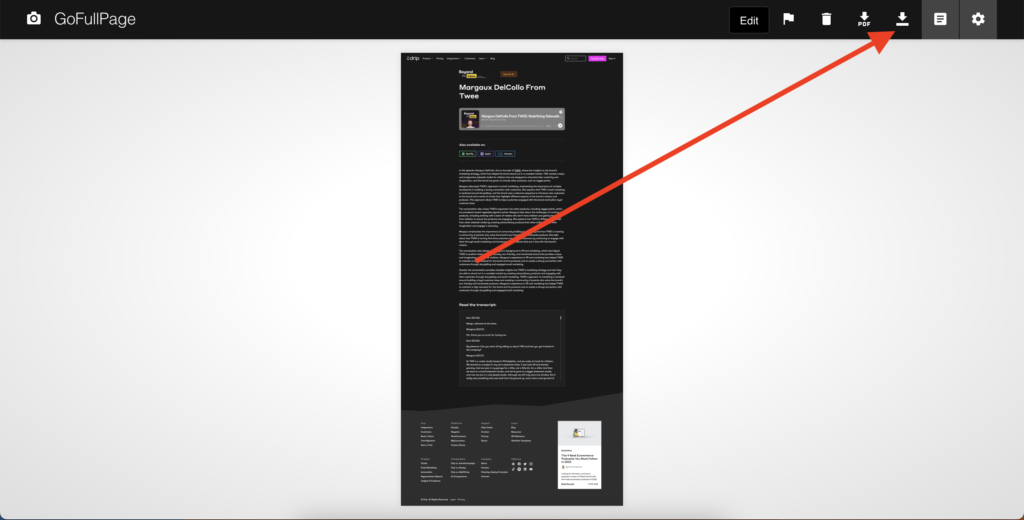
Load the page into the Chrome browser and use the GoFullPage Chrome Extension to capture the full page screenshot.
This will create a full screen JPG that you can then save to your computer.
Step 2: Create SmartMockup with MacBook Air Template
Use the MacBook Air Template from SmartMockups and upload from image to the template.
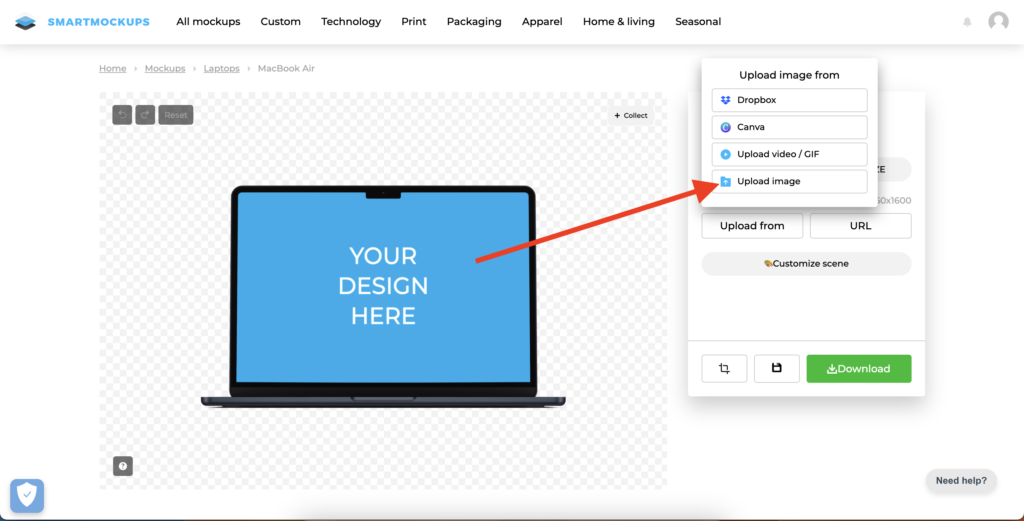
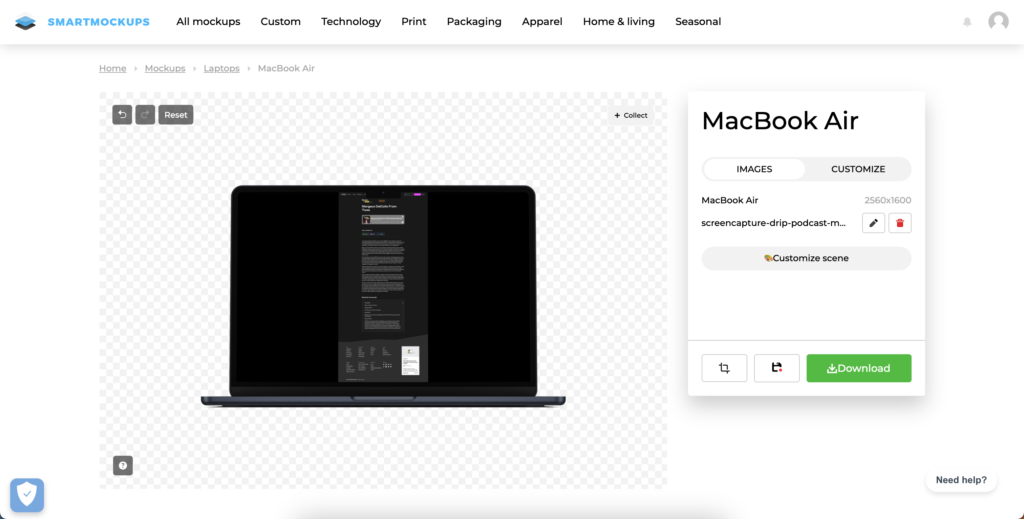
Once the file is uploaded to SmartMockups, you’ll see how it appears really small with lots of black space on the left and right. It needs to be cropped properly.
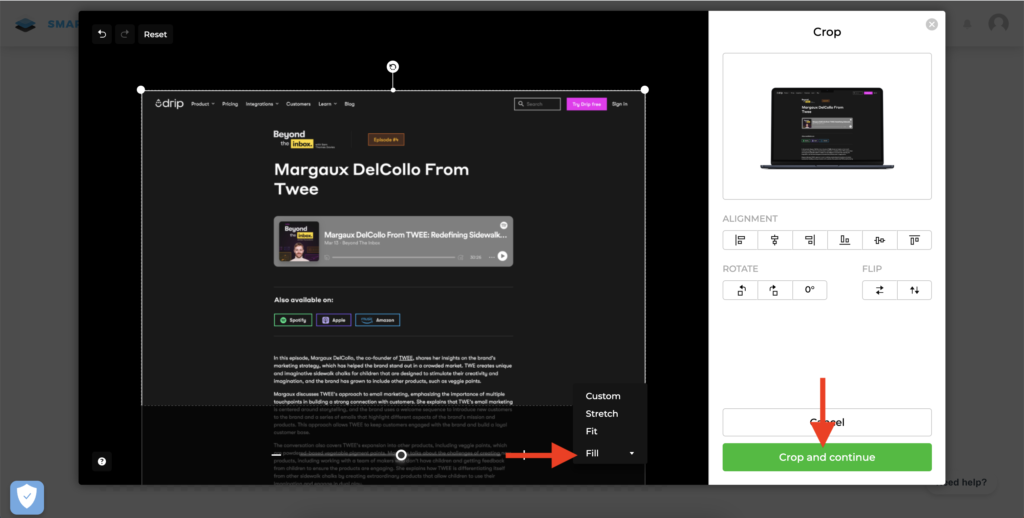
Click the Pencil Icon and with the new options, click Fill and then Crop and Continue. You’ll see that the screenshot is now properly cropped. You may need to make a small adjustment to the sizing, but for the most part it should be good.
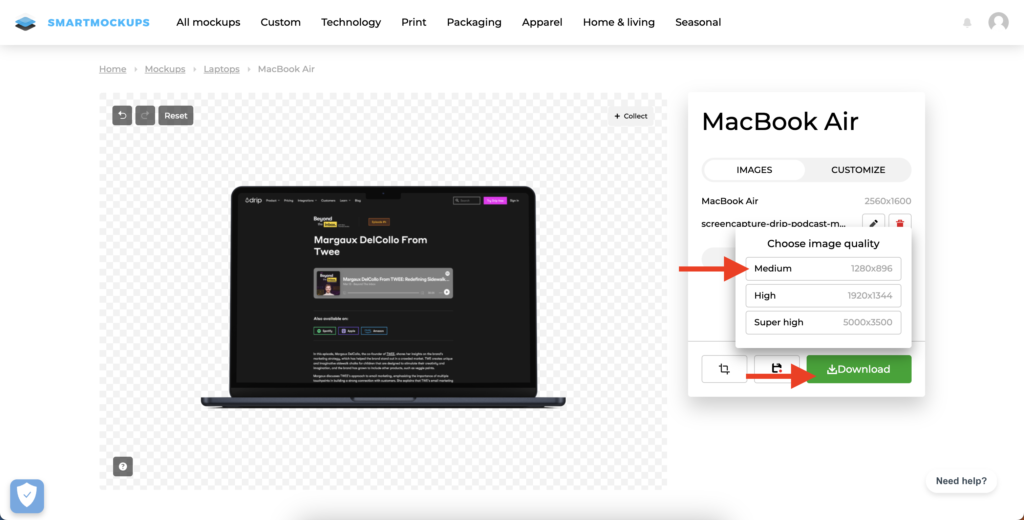
Once cropped, download the Small size graphic to your computer.
Step 3: Add Webpage to Membership Site
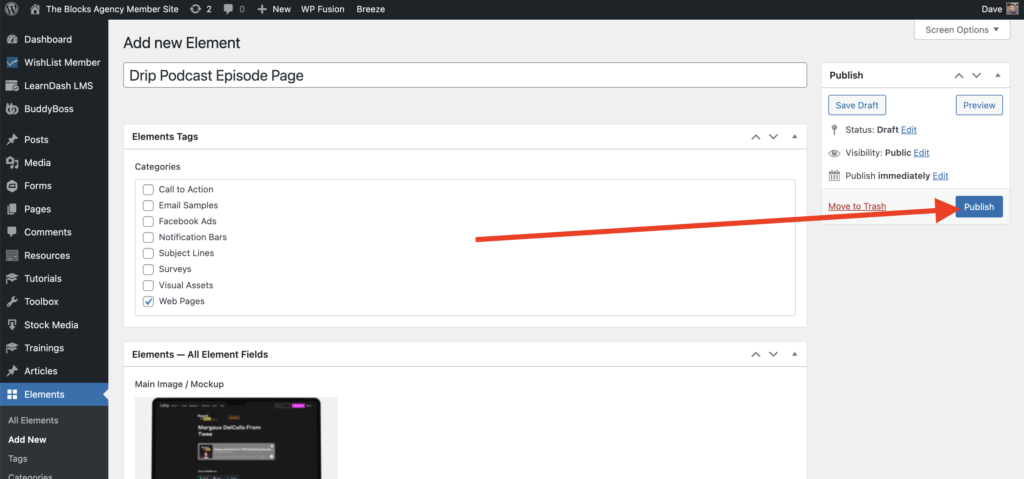
Go to the TBA Membership Site and proceed to create a new Element and then proceed to fill in the details.
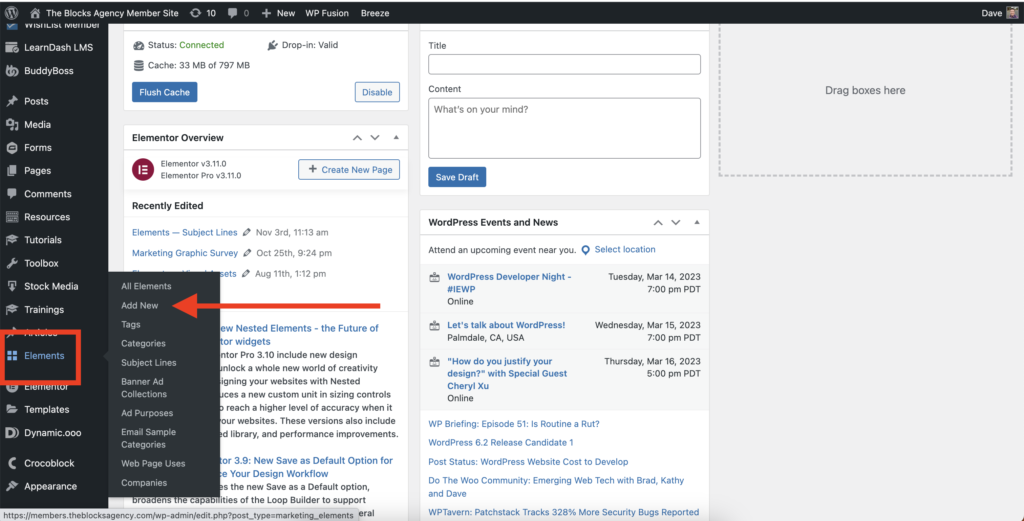
Here are directions for filling in the fields.
Add Title
This is where you’ll add the title. For this webpage it will be Drip Podcast Episode Page.
Elements Tags > Categories
Select the Web Pages option. This will reveal additional options at the bottom of the page.
Elements > All Element Fields > Main Image / Mockup
This is where you upload the SmartMockups mockup you created.
Description
A short description of the webpage. For this example it is “An individual podcast episode page with player embed, show description, and full transcript.”
Credits
Select the company this is associated with. In this case it is Drip.
Elements > Elements Web Pages > Mockup
Upload your SmartMockups image here.
Screenshot
Upload the actual screenshot here. The full screenshot.
Use Cases
This is where you select what type of page it is. This allows people to quickly find examples for whatever they are looking for. In this case it is Podcast.
Description
Use the same description as you used above… “An individual podcast episode page with player embed, show description, and full transcript.”
Credit
Choose the associated company. In this case, Drip.
Step 4: Publish and Check Work
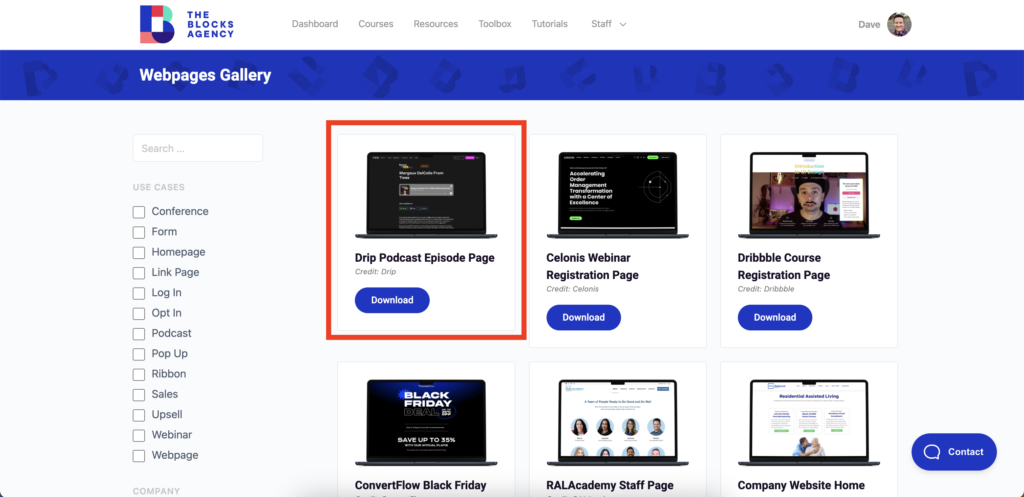
After you’ve added all the content, Publish your page and then proceed to check your work on the front end of the site.
